Grid Mounting Instructions for SPARO
Below is a description of how to mount a polarizing grid
onto the front of SPARO's snout for calibration purposes.
A discussion of integration times needed when doing grid
tests can be found in Giles'
E-mail
The test grid used on SPARO is a gold colored
rectangle which is 50 mm x 70 mm. It should be located
in a plexiglass holder(with some masking tape on it)in the
SPARO closet.
It is either on one of the shelves or in the red toolbox
where other optics are kept. Be careful when handling
it as it can freely slide out of the plexiglass and the
wires are fragile.
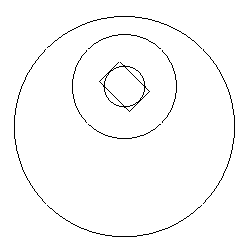
The grid is mounted on the front of SPARO's snout at approximately
a 45 degree angle as shown in the first image below. Two custom
retainer clips are used to mount the grid and do so by exerting
pressure on the sides of the grid. These clips are attached to
SPARO's snout already. To install the grid, place it between the
clips(such that the side to which the wires are soldered faces the
pressure window) and tighten the screws which hold the clips to the snout just
snug enough to hold the grid in place.
It is important not to overtighten to avoid a leak in the o-ring
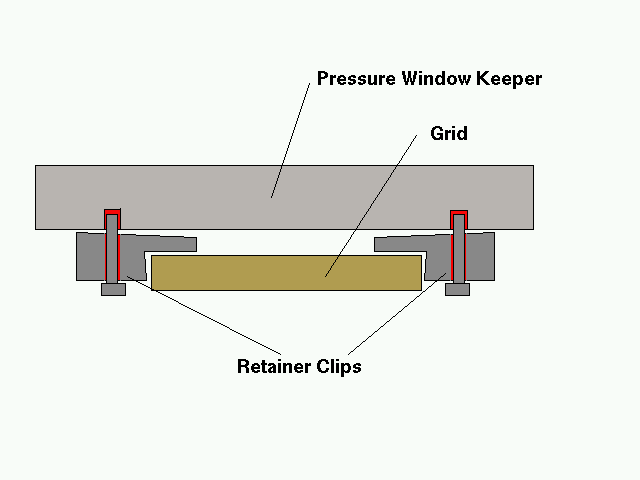
seal. The second diagram shows the mechanics involved in holding the
grid on the snout. The final figure is a link to a photo of the installed grid, taken at Pole.